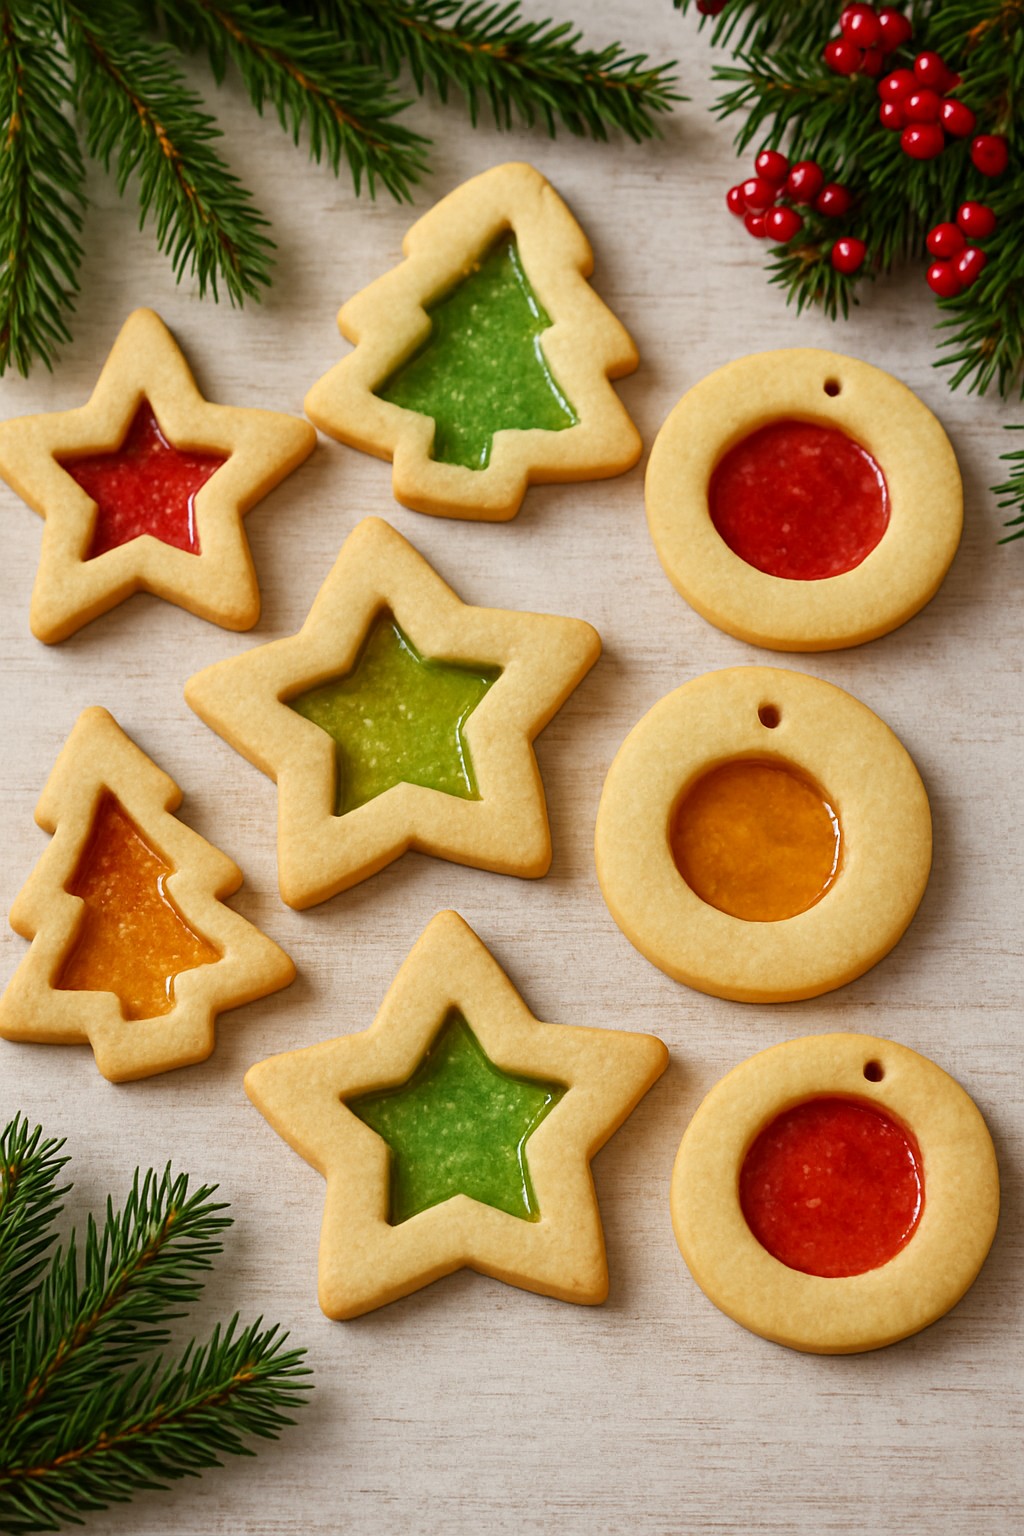
Christmas Stained Glass Cookies

These Christmas Stained Glass Cookies are a holiday showstopper! With their colorful “glass” centers catching the light, these cookies look like they came straight out of Santa’s workshop. They’re crisp on the edges, buttery and soft inside, and the jewel-like centers add a fun pop of sweetness. Whether you’re baking for family, gifting to neighbors, or decorating your cookie trays, these cookies bring instant Christmas magic.
⭐ Why You’ll Love This Recipe
- Beautiful and festive — They truly resemble stained glass ornaments.
- Fun to make — Great for kids or a holiday baking party.
- Simple ingredients — A classic sugar cookie dough + crushed candies.
- Perfect for gifting — They hold their shape beautifully and look impressive.
🎄 Ingredients
For the Cookie Dough:
- 2 ½ cups all-purpose flour
- ½ teaspoon baking powder
- ½ teaspoon salt
- ¾ cup unsalted butter, softened
- ¾ cup granulated sugar
- 1 large egg
- 1 tablespoon vanilla extract (or 1 tsp vanilla + 1 tsp almond extract)
- 1–2 tablespoons milk (only if needed for texture)
For the Stained Glass Centers:
- 1 cup assorted hard candies (Jolly Ranchers or Lifesavers), separated by color and finely crushed
- Baking sheet (2)
- Medium bowl
- Whisk
- Large bowl
- Measuring cups / spoons
- Electric mixer
- Rolling pin with spacer
- Cookie cutters
🎁 Instructions
1. Make the Cookie Dough
- In a medium bowl, whisk together flour, baking powder, and salt.
- In a large bowl, beat butter and sugar until light and fluffy (2–3 minutes) using electric mixer.
- Add the egg and vanilla, mixing until combined.
- Add the dry ingredients to the wet ingredients and mix just until a dough forms.
- If dough feels too dry, add 1 tablespoon milk at a time.
- Divide dough in half, flatten into disks, wrap, and refrigerate 1 hour.
2. Prep the Stained Glass
- Place hard candies into zip bags by color.
- Crush with a rolling pin until pieces resemble coarse sand.
- Keep each color separate for the prettiest effect.
3. Roll & Cut
- Preheat oven to 350°F (175°C).
- Line baking sheets with parchment paper or silicone mats (important so the candy doesn’t stick!).
- On a lightly floured surface, roll dough to ¼-inch thickness (use a spacer for even thickness).
- Cut out larger shapes with cookie cutters, and place on baking sheet lined with parchment paper.
- Use a smaller cutter to remove the centers — this is where the “glass” goes.
4. Add the “Stained Glass”
- Spoon crushed candy into each cut-out center.
- Fill generously, but don’t overfill the edges.
- Bake for 8–10 minutes, until edges are light golden and candy is fully melted.
- Cool completely on the baking sheet.
- The candy will harden as it cools, forming a beautiful glass effect.
🎄 How to Make Stained Glass Cookies You Can Hang on the Tree (on on the window)

1. Create a Hanging Hole Before Baking
After cutting the big cookie shape and removing the center:
- Use a small round piping tip, a bubble tea straw, or a regular straw to punch a hole near the top of the cookie.
- Make sure the hole isn’t too close to the edge—leave at least ¼ inch of dough around it so it stays strong.
- The hole will shrink slightly during baking but should remain open.
2. Fill With Crushed Candy as Usual
Add the candy to the center cut-out, but don’t fill the hanging hole.
3. Bake and Cool Completely
Once baked, allow cookies to cool fully on the parchment.
The candy will harden into “glass,” and the hole will stay open.
4. Add Ribbon or Twine
Use:
- Thin ribbon
- Baker’s twine
- Narrow fabric ties
- Ornament hooks
Thread gently through the hole and tie.
⭐ Pro Tips
- If the hole closes slightly during baking, you can gently reopen it with a skewer while the cookie is still warm.
- Choose lighter-weight candy or thinner layers for sturdier hanging cookies.
- Let them dry overnight for extra firmness before adding to the tree.

🎀 Tips for Perfect Stained Glass Cookies
- Chill the dough well to keep shapes sharp.
- Use separate bags for each candy color to avoid muddiness.
- Do not move cookies until completely cool — the melted centers are soft while warm.
- For hanging ornaments, poke a small hole with a straw before baking.
🎅 How to Store
- Store in an airtight container up to 5–7 days.
- Place parchment between layers to protect the “glass.”
- Avoid humidity—moisture can cloud the candy centers.
✨ Serving Ideas
- Add to Christmas cookie platters
- Wrap individually as edible ornaments
- Thread with ribbon for gorgeous tree décor
- Use as window decorations for parties or kids’ events
MERRY CHRISTMAS! Enjoy!
Please enjoy our other recipes:
Leave a Reply